UPDATING A HOME TO BE A STUNNING VACATION RENTAL
I love it when I get to build relationships with clients that have more than one project. Last fall, one of my clients called me and said he was thinking about buying a house in Stowe and renovating it to be a vacation rental property and wanted to know if I could look at the place before he decided to buy it. We headed to the house — which was on a beautiful piece of property. It was truly a white elephant. It had a crazy Gothic look to it — not a cool Gothic look — but an outdated, scary, what the hell where they thinking? look. But behind all that craziness I saw potential — it had some nice features, woodwork and layout —with great views. We chatted about costs — which is important — especially when it is an investment property and needs to have a strong cash flow. So with a budget in mind, and him giving me free reign on the design — which I love, I worked to the builder to create a space that looked amazing but didn’t break the bank. I hope you enjoy this transformation. The home is for rent in Stowe, Vermont — and as soon as it gets list, I’ll add the link here. After photos by Lindsay Selin.

As soon as you walked in the door, this is what you saw. Outdated red carpeting, dark wood, yellow tinted walls, and a very dark space. Seriously, if the devil doorknocker didn’t frighten me (true story) then this interior certainly did.

I loved the bones of the house but you couldn’t see the character will the dark carpeting and the dull paint. So we painted the house a bright white and left the large beams and woodwork that had character natural and painted the rest. The flooring is local maple — I called a lumber yard and asked what they had they wanted to get rid of or had extra off — and got a great price. Even with the install it was less expensive than faux wood! There is so much character in the wood and it really brightens up the space and as we all know — real wood adds values to the house. We also removed the old pantry (added one to the new kitchen area) and moved the sliding door to the deck and add more windows — which really added serious light to the space. Don’t ever underestimate the power of natural light.

Dark wood, more dark wood… oh and some dark wood! The owner wanted to remove the lower cabinet doors but I said — they will look totally different once painted. The fireplace was this crazy contraction that was raised and lowered — then the vents had to be opened. All I could think was renters would smoke up the house — or worse burn it down — with all the instructions that came with making a fire.

So we decided to put in an easy — turn on the switch gas fireplace — and place a TV over it. The couch I picked up for a great price at a furniture store- basically they had a return — and I grabbed some cool antique pieces and misc. second hand shop (Goodwill) goodies and books. Picked up the large needlepoint rug at an Estate sale. All the furnishings and decor in the living room cost less than $1500. Greenery really makes a difference in your spaces. Some are real — some are fake :)

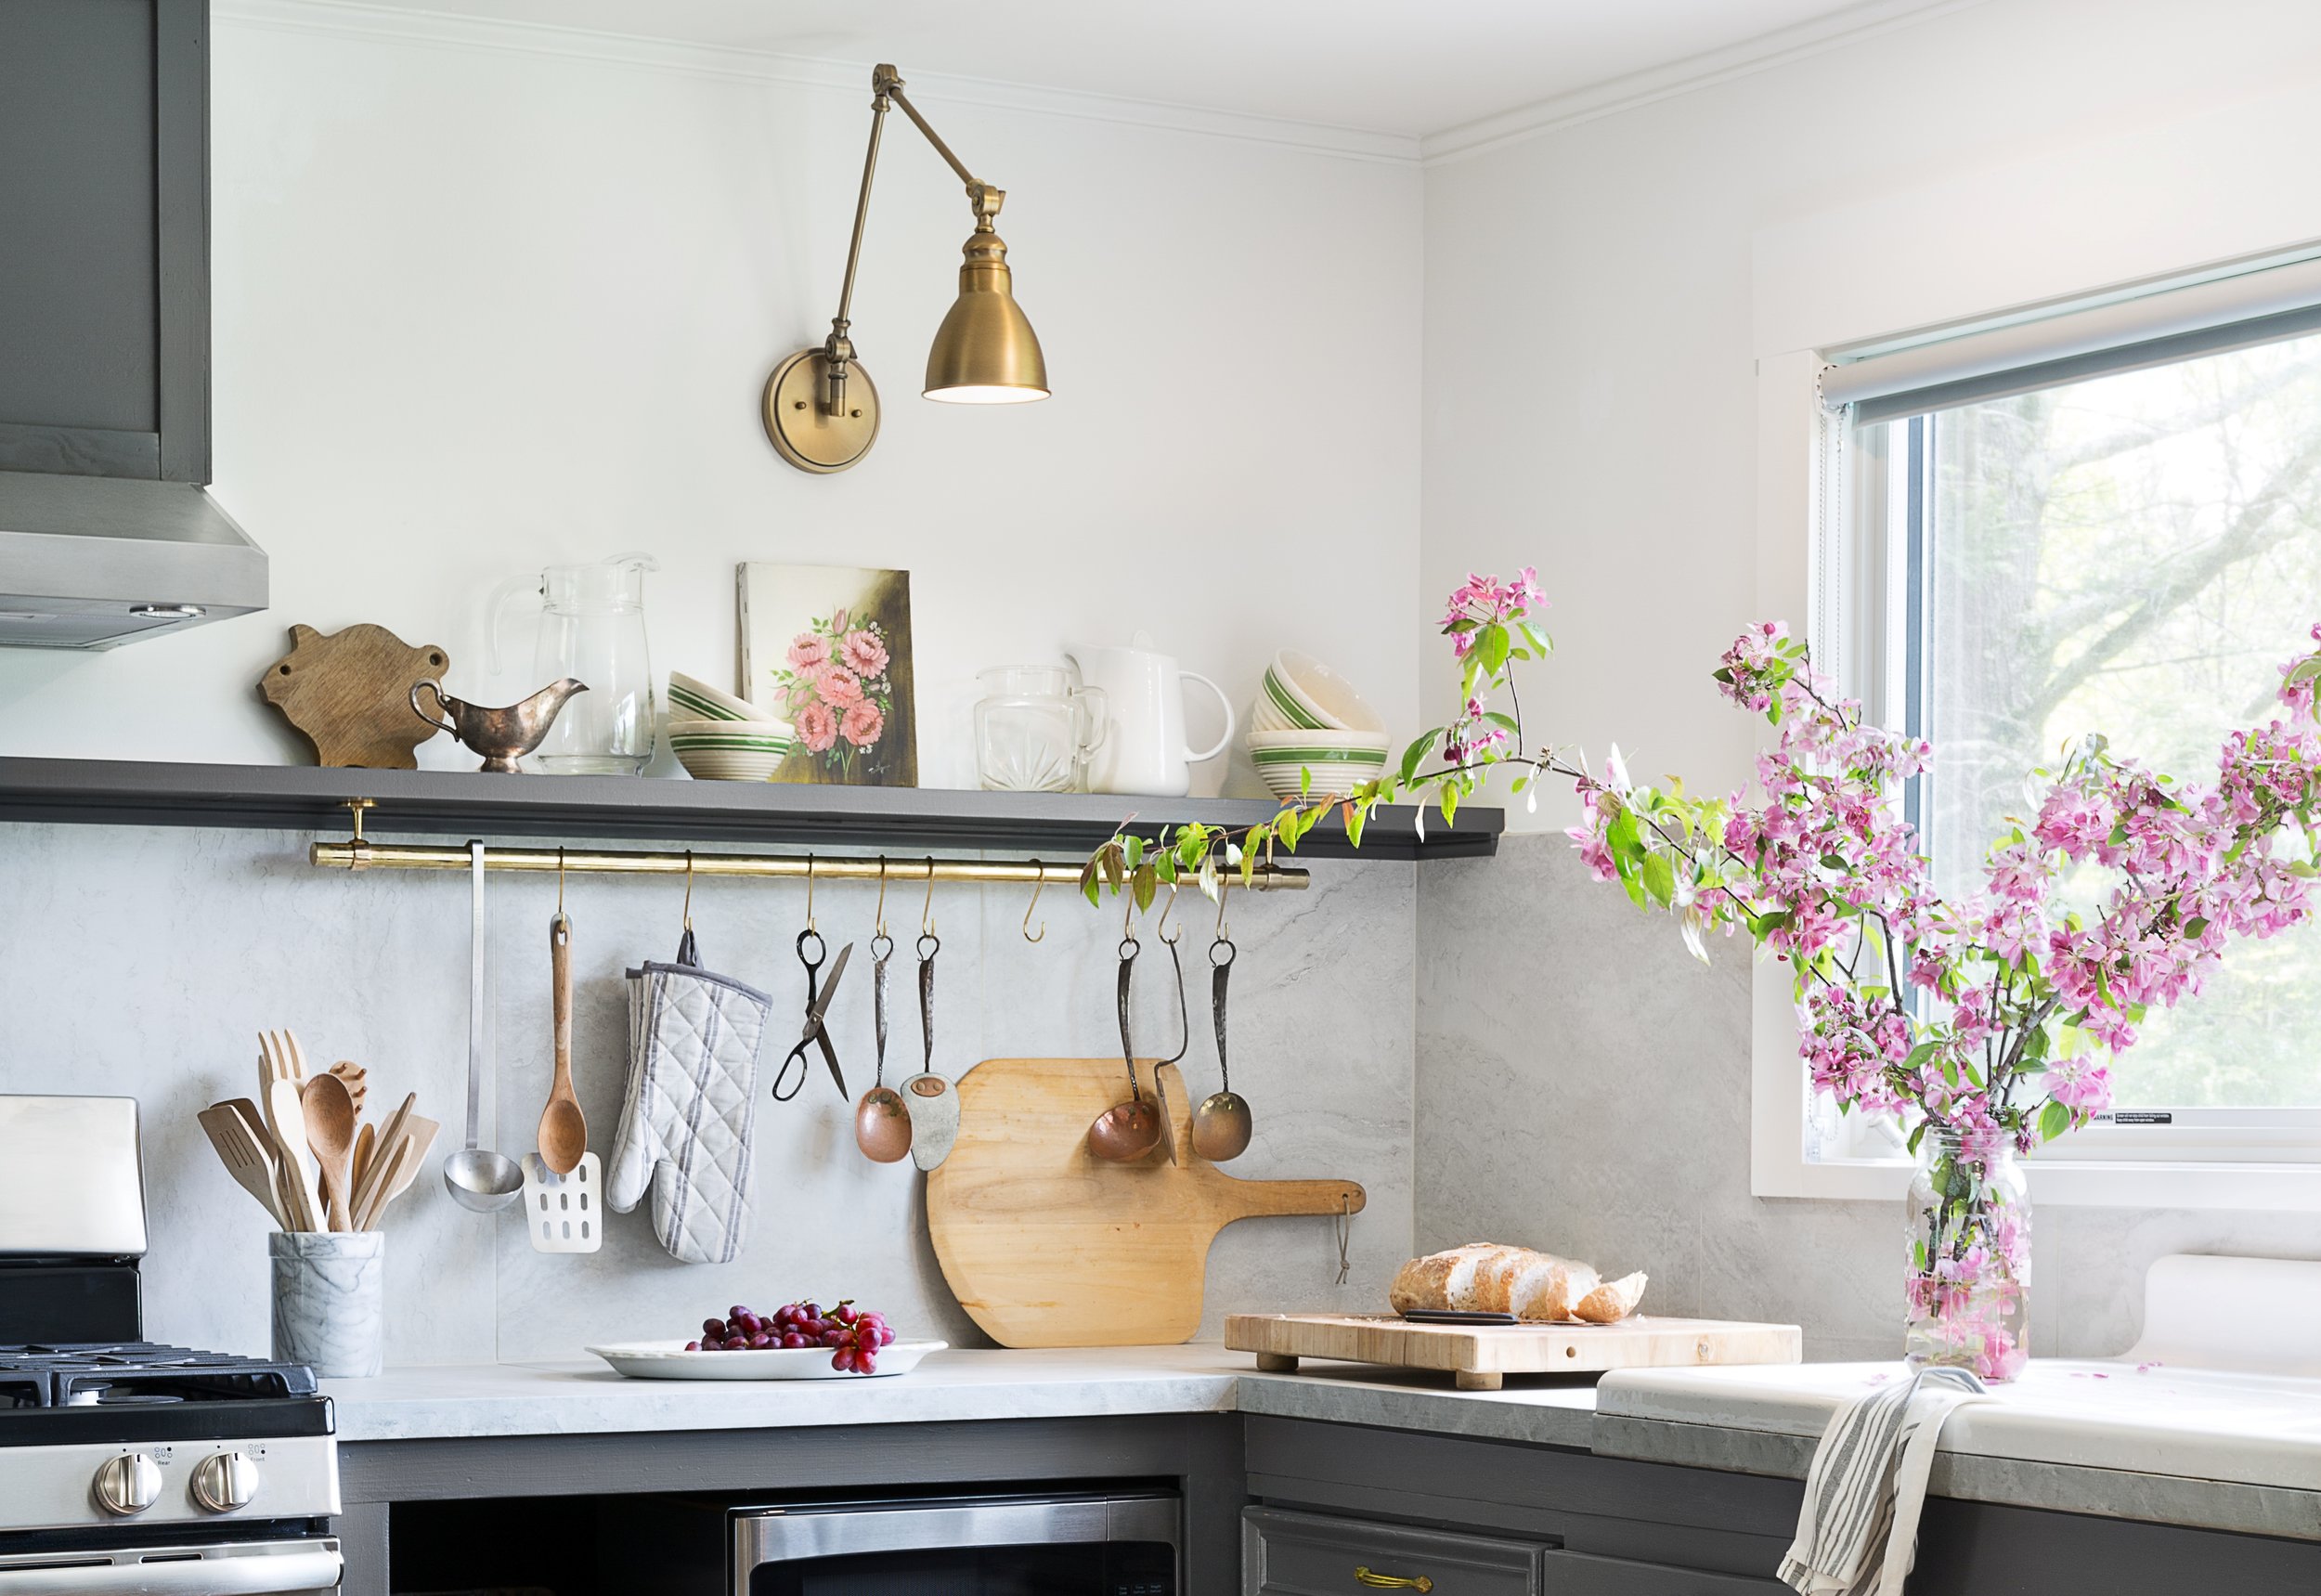
When you walked into the kitchen a wall split the space between the tiny kitchen and the dining room. There was almost no natural light and the space was very outdated and cramped. The place sleeps 12 people and I couldn’t see anyone scanning the hosting sites like Airbnb and VRBO, or bookings.com and saying — wow — I have got to stay there with these spaces as they were. So we made big changes but surprisingly affordable ones.

As you can see, the wall is removed — but because we still needed to have a structural beam (and instead of getting an expensive steel beam to expand the space) we keep the beam where it was and created a “box” around the refrig’s new location — clever right! The stove is in the exact same position — again, saving money by not changing the location of the gas or electrical elements. The open shelving cabinets the builder made — more affordable that purchasing cabinets with doors — and the cabinets that do have the drawers — we keep from the old kitchen and painted the same color as the rest of the cabinets — a peppercorn gray. The counter top is 2 x 2 pieces of porcelain tile — not stone — did we fool you? I wanted that old European look with large stone counters and high stone back splash but those tend to be pricey — so I found some tile pieces in a leftover/discount section of a tile shop and the builder put them in and faced them with a piece of wood to make them look thicker — which I then gave a faux stone painted finish too — very easy. Picked up pieces of brass from Signature hardware for two pot racks for around $100 — which really bring this space to another level. The vintage sink I picked up at Mason Brothers architectural salvage yard (we traded some of the cool fixtures that we removed). Almost all of the dishes, bowls, plates, canisters, kitchen utensils I picked up with a few trips to Goodwill. Some of the antique bowls and copper pieces I got at my local antique shop — and all the appliances are new.

Here is the dining room looking into the kitchen. In the kitchen we removed the door (because we put in the living room) and placed a narrow pantry there, along with three large windows. The furniture the previous owner took — but he did leave the chandelier — which I had rewired — so we could swag it over the new table.

Here is the view of the dining room now. Open kitchen plan with dining table in the middle — a little more inviting and friendly for large groups — and the light spilling in from both windows! We even created a little desk area at the kitchen counter, and a coffee station. The builder made the table for me — which I love — and the pop of color will really catch a potential guests eye while their scanning vacation rentals online!

The new pantry with doors we actually found in the basement! Waste not want not — we painted them to match the cabinets. Photo by Joanne.

Moving upstairs… do you feel a theme — dark — dingy — tiny. This room had a large closet and then a double bed and some closets that ran along the angled wall. Lots of closets — not a lot of room to move around. Plus, we needed to add more beds. So we transformed this room but taking out the large closet along the right wall (you can’t see in picture) and created a bunk bed area instead.

The perfect bunk room. We removed the low closets along the angled wall and created built in twin beds, painted everything bright white — except the amazing beams in the ceiling, added a modern carpet and transformed a large closet into bunk beds. The desk I found at an Estate sale and the coffee table at a second hand shop. We added lots of hooks to the walls as well as luggage racks — plenty of space for suitcases and to move around!

Photo by Joanne.

This was the only bathroom upstairs (there was a scary one in the basement) until we added a bathroom in the master bedroom’s closet. It was dark with a very claustrophobic shower.

I can breathe now! Just by removing the cabinets along the wall, updating the finishes and cabinet and painting everything white, we were able to complete transform this bathroom.

There is more to this amazing vacation rental transformation — including the master bedroom and closet turned master bathroom and more … which I’m thrilled to say will be featured in an upcoming book by myself and my twin sister Rosanne, Rock Your Rental: Style, Design, and Marketing Tips to Boost Your Bookings which is already listed for PRE-ORDER on AMAZON! :)